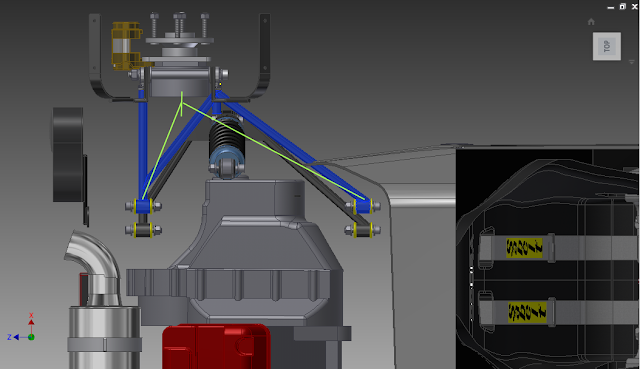
I'll start with a picture of the suspension, so it's easier for me to explain:
As you can see, the upright looks completely different from the one I've started with (on your right). Now because I'll have to actually make the upright myself (do all the cutting, welding, measuring etc.) I took the easy way out. I mirrored the bottom part of the upright to the top, and that got it where it is. Yes, it's heavier. Yes, that means more unsprung weight. But if that is the cost for increasing safety and rigidity, I'm willing to pay the price.
As you can see it's suspended by four rose-joints (rod-ends, u-joints whatever). That might be the problem when I'll need to attach the upright to the wishbones, because It has to be absolutely vertical. Otherwise it may have some camber and toe angle, which for the default setup, is not favourable.
The blue part is the top wishbone. Green lines indicate where the top wishbone used to be in the previous design. Can you see the problem? It hits the damper. That's why I had no other choice than redesign mostly everything. But this is a good thing. The wishbones are now sturdier and can withstand more stress without bending. This design is not the best though. The bushings will wear out faster because of the extreme angle, but that's the price of a wide suspension setup and most of the people can afford it.
Hope this made things a bit more clear.


No comments:
Post a Comment